Gazebo Assembly Diagrams
Blueprints To Craft Garden Summerhouse : Uncover Practical Techniques To Build A Pergola Accurately
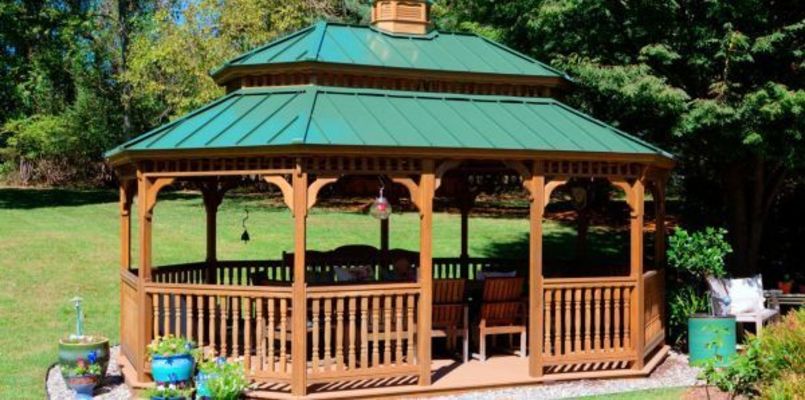
A simplified version of a wooden summerhouse with a small platform, a cute gabled roof and some basic furniture will do the trick. This might give you some ideas that could help. One carpenter laid out and began to cut the rafters. Which load to use depends on several factors, including the nail length, thickness of material being fastened, and hardness of the concrete. Use a support level to make them plumb in both directions. (https://pergoladrafts.com/10x10-diy-square-gazebo-plans-blueprints) Temporarily tack this board in place and then proceed with the next 1060mm board, butting up tight to the first board and tacking to the next rafter.
Make the notches and remove the excess. Secure the struts with angle-driven screws to the peak beam and the ledger board, and to the horizontal eave beam. Mix fast-drying cement in a wheelbarrow according to the manufacturer's directions, and pour it into the holes to within an inch of the surface. Plumb the columns with a spirit level, before attaching the braces. As the concrete dries, it will be necessary to use some type of support system in order to hold the supports up. After two of three months, check the bolts, nuts and lag screws. Cut the beams as shown in the diagram.
So don't think you need to spend a fortune to make a big statement in your backyard. If they have something (over at this website) like small claims court there, that may be your best bet to avoid paying for at least some of the substandard work. Set any exposed nail heads beneath the surface and fill the holes with matching wood filler. As you could notice in the plans, you have to make notches to the beams, so you could join then them together. Each post support is constructed of 4 pieces of wood. Trim back low-lying bushes and ground cover from around the base to allow fresh air to circulate under the floor.
Procesando video...
As a result it will last without the need for chemical treatments. Then, take one set of balusters and screw them into one separate long board. The countersink hole would recess the threaded rod, washers and nuts. Most are standard-sized pallets which measure about 1200mm x 1000mm but there is also a longer type, used for plaster board. Mark rafter positions in case they get shifted while you work. Screw the supports to stakes driven into the ground. By this time, the sun was fading, and so were we, so we wrapped up and rehydrated ourselves in an appropriate fashion.
Cut the long upper supports to length. Repeat the process for the back rest. While the base was still fireproof, it wasn't any of the other things we had intended. Next, assemble the four fence columns to create an 8 x 6 foot base. The corners of the stiff shingles may stand up at first, but a few hours in the hot sun would make them lie flat. While a majority of the calculations are completed that part, be careful to ensure that all of the cuts are correct, as it is easy to cut something backwards. It's the perfect addition to our outdoor enclosed patio.
In addition, a proper planning could prevent many costly mistakes. All those ridges and sunken spots meant hours of tedious shimming under the sleepers to form a flat surface for the decking. Increase the value of this space by creating a secondary area for chatting and relaxing together. Invest in the best quality materials you could afford. Install a second hurricane tie onto the second beam and the opposite side of the cross piece. So this is what we're gonna do. Complete both holes, recheck alignment and wait two days before adding to the structure. Again you could offer them the desired decorative effect by cutting their ends with a jigsaw on drawn lines.
My only question is about the top ridge supports. You could either cut this with a miter saw or use a carpenter square to draw a 45 degree angle and cut it with a skill saw. Insert the strip, or make another cut. To prevent cracking the rafter tails, predrill and screw the plywood along the lower edge. They are built over support beams and covered with climbing plants to keep the rooms and outdoor cool. Vertical they did not and kept trying to shift at the most inopportune moment. Seal the finish with spar varnish, so you protect the components from decay.
Thinking of a smaller table and lounge. Because of the depth of the hole and the stiffness of the concrete, the support will stay up by itself.